Gauntlet Curses: What to Pick and Avoid
What this page helps you decide: which Gauntlet curse to take at each choice, and which ones will end your run later
The Gauntlet hands you a choice of curses every 25 waves, and the options get more consequential the deeper you go. Rather than memorising a list that changes with every update, this page gives the rule that sorts almost every option, then shows how experienced players apply it across the wave bands.

The rule that sorts almost every choice
Gauntlet options fall into two families: ones that make your towers better, and ones that make the waves worse in exchange for something. Anything raising your damage, attack speed, range or placement count is a straightforward gain that compounds for the rest of the run. Anything raising enemy health, enemy speed or enemy count is a compounding loss, and the reward attached to it almost never keeps pace, because your tower output grows in steps while enemy scaling grows every wave. That asymmetry is why the same choice can look fine at wave 30 and end your run at wave 130 - you are not comparing this wave against this wave, you are comparing a one-time boost against a permanent surcharge.
Early bands: waves 1 to 50
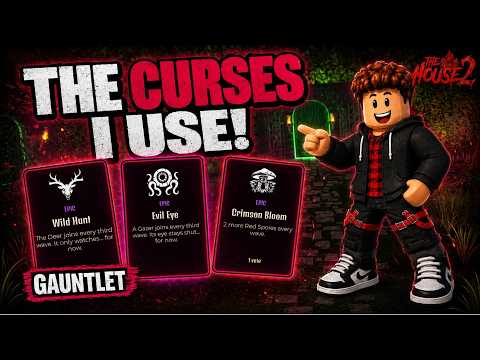
Through the first fifty waves the pool includes options such as Clipper Bloom, Spore Storm, Demon Pack, Overclock, Holy Ward and Military Ward, all of which are ordinary gains. The choices to refuse are the ones adding enemy health or speed, along with Demon Ward. From wave 26 onward, Gargoyle Roost, Demon Pact and Crimson Bloom join the list of reasonable picks, and faction-specific damage boosts like Grave Rite or Paranormal Reach become worth taking if they match the faction you are actually running. That last condition does the work: a large boost to a faction you have two units from is worse than a small general one.
Middle and late bands: waves 51 onward
Past wave 50 the emphasis shifts toward Overclock and Sharpened Edges, with later versions of Sharpened Edges reaching as much as 30% additional tower damage. Chomper's Toll is usable. Hive Growth becomes genuinely debatable, because it adds enemies every wave - exactly the shape the rule warns about, in exchange for a real benefit. In the later bands the pool includes Reinforcements, which grants an extra unit placement and is one of the few effects that scales with everything else you own. Choices continue through the 101 to 225 bands, and the deeper you get the more the rule matters, because a compounding surcharge taken at wave 150 has fewer waves to pay you back and more waves to punish you.
Why your loadout changes the answer
None of this is a fixed ranking, and treating it as one is the common mistake. A faction-damage option is excellent or worthless depending entirely on how many of your units belong to that faction. Extra placement is worth more if you have strong units left on the bench and less if your board is already the best units you own. Enemy-speed modifiers hurt beam and single-shot setups more than area damage. The rule tells you which family an option belongs to; your own board decides how much a member of that family is worth to you. When two options are in the same family and you cannot separate them, take the one whose effect you will notice within the next wave - immediate feedback is worth more than a marginally better number you cannot verify.
Step-by-Step
- Sort each option: does it improve your towers, or worsen the waves?
- Take tower damage, attack speed, range and extra placements by default.
- Refuse enemy health, enemy speed and extra enemy count unless the payoff is exceptional.
- Take faction-specific boosts only when several of your units share that faction.
- Past wave 100, weigh compounding costs harder - fewer waves remain to repay them.
Data Tables
| Wave band | Commonly taken | Commonly refused |
|---|---|---|
| 1 to 25 | Clipper Bloom, Spore Storm, Demon Pack, Overclock, Holy Ward, Military Ward | Enemy health or speed, Demon Ward |
| 26 to 50 | Gargoyle Roost, Demon Pact, Crimson Bloom, Holy Ward | Faction boosts for factions you do not run |
| 51 to 75 | Overclock, Sharpened Edges, Chomper's Toll | Hive Growth (adds enemies every wave) |
| 76 and beyond | Sharpened Edges up to 30% damage, Reinforcements | Anything strengthening enemies or weakening your factions |
Figures are player-reported in community video kv60UTl4P0Y by Rubenakayoshii, not developer-published. Ratios, shares and expected values are our own arithmetic on those figures. Checked 2026-09-16.
Tips & Notes
- A one-time boost against a permanent surcharge is a losing trade by wave 100 - that single comparison settles most Gauntlet choices.
FAQ
How often does the Gauntlet offer a curse choice?
Every 25 waves, and the options available change as you progress through the bands.
What is the best Gauntlet curse in The House TD 2?
There is no single best pick. Reinforcements and high-tier Sharpened Edges are strong for most boards, but faction-specific options depend entirely on your units.
Should I ever take a curse that buffs enemies?
Rarely. Enemy buffs compound every wave while your gain is one-time, so the deeper you are the worse that trade becomes.